It’s not much better Doctor!

If there was a train doctor, this is what I would tell him! I’ve tried taking the tablets, using certain colours even doing a bit more work but many parts of the layout are at the scenic but messy stage and it’s not getting much better yet. This is a stage we all have to go through but not many people share this. SO, I’m going to be brave. Please be gentle, it won’t always be like this.

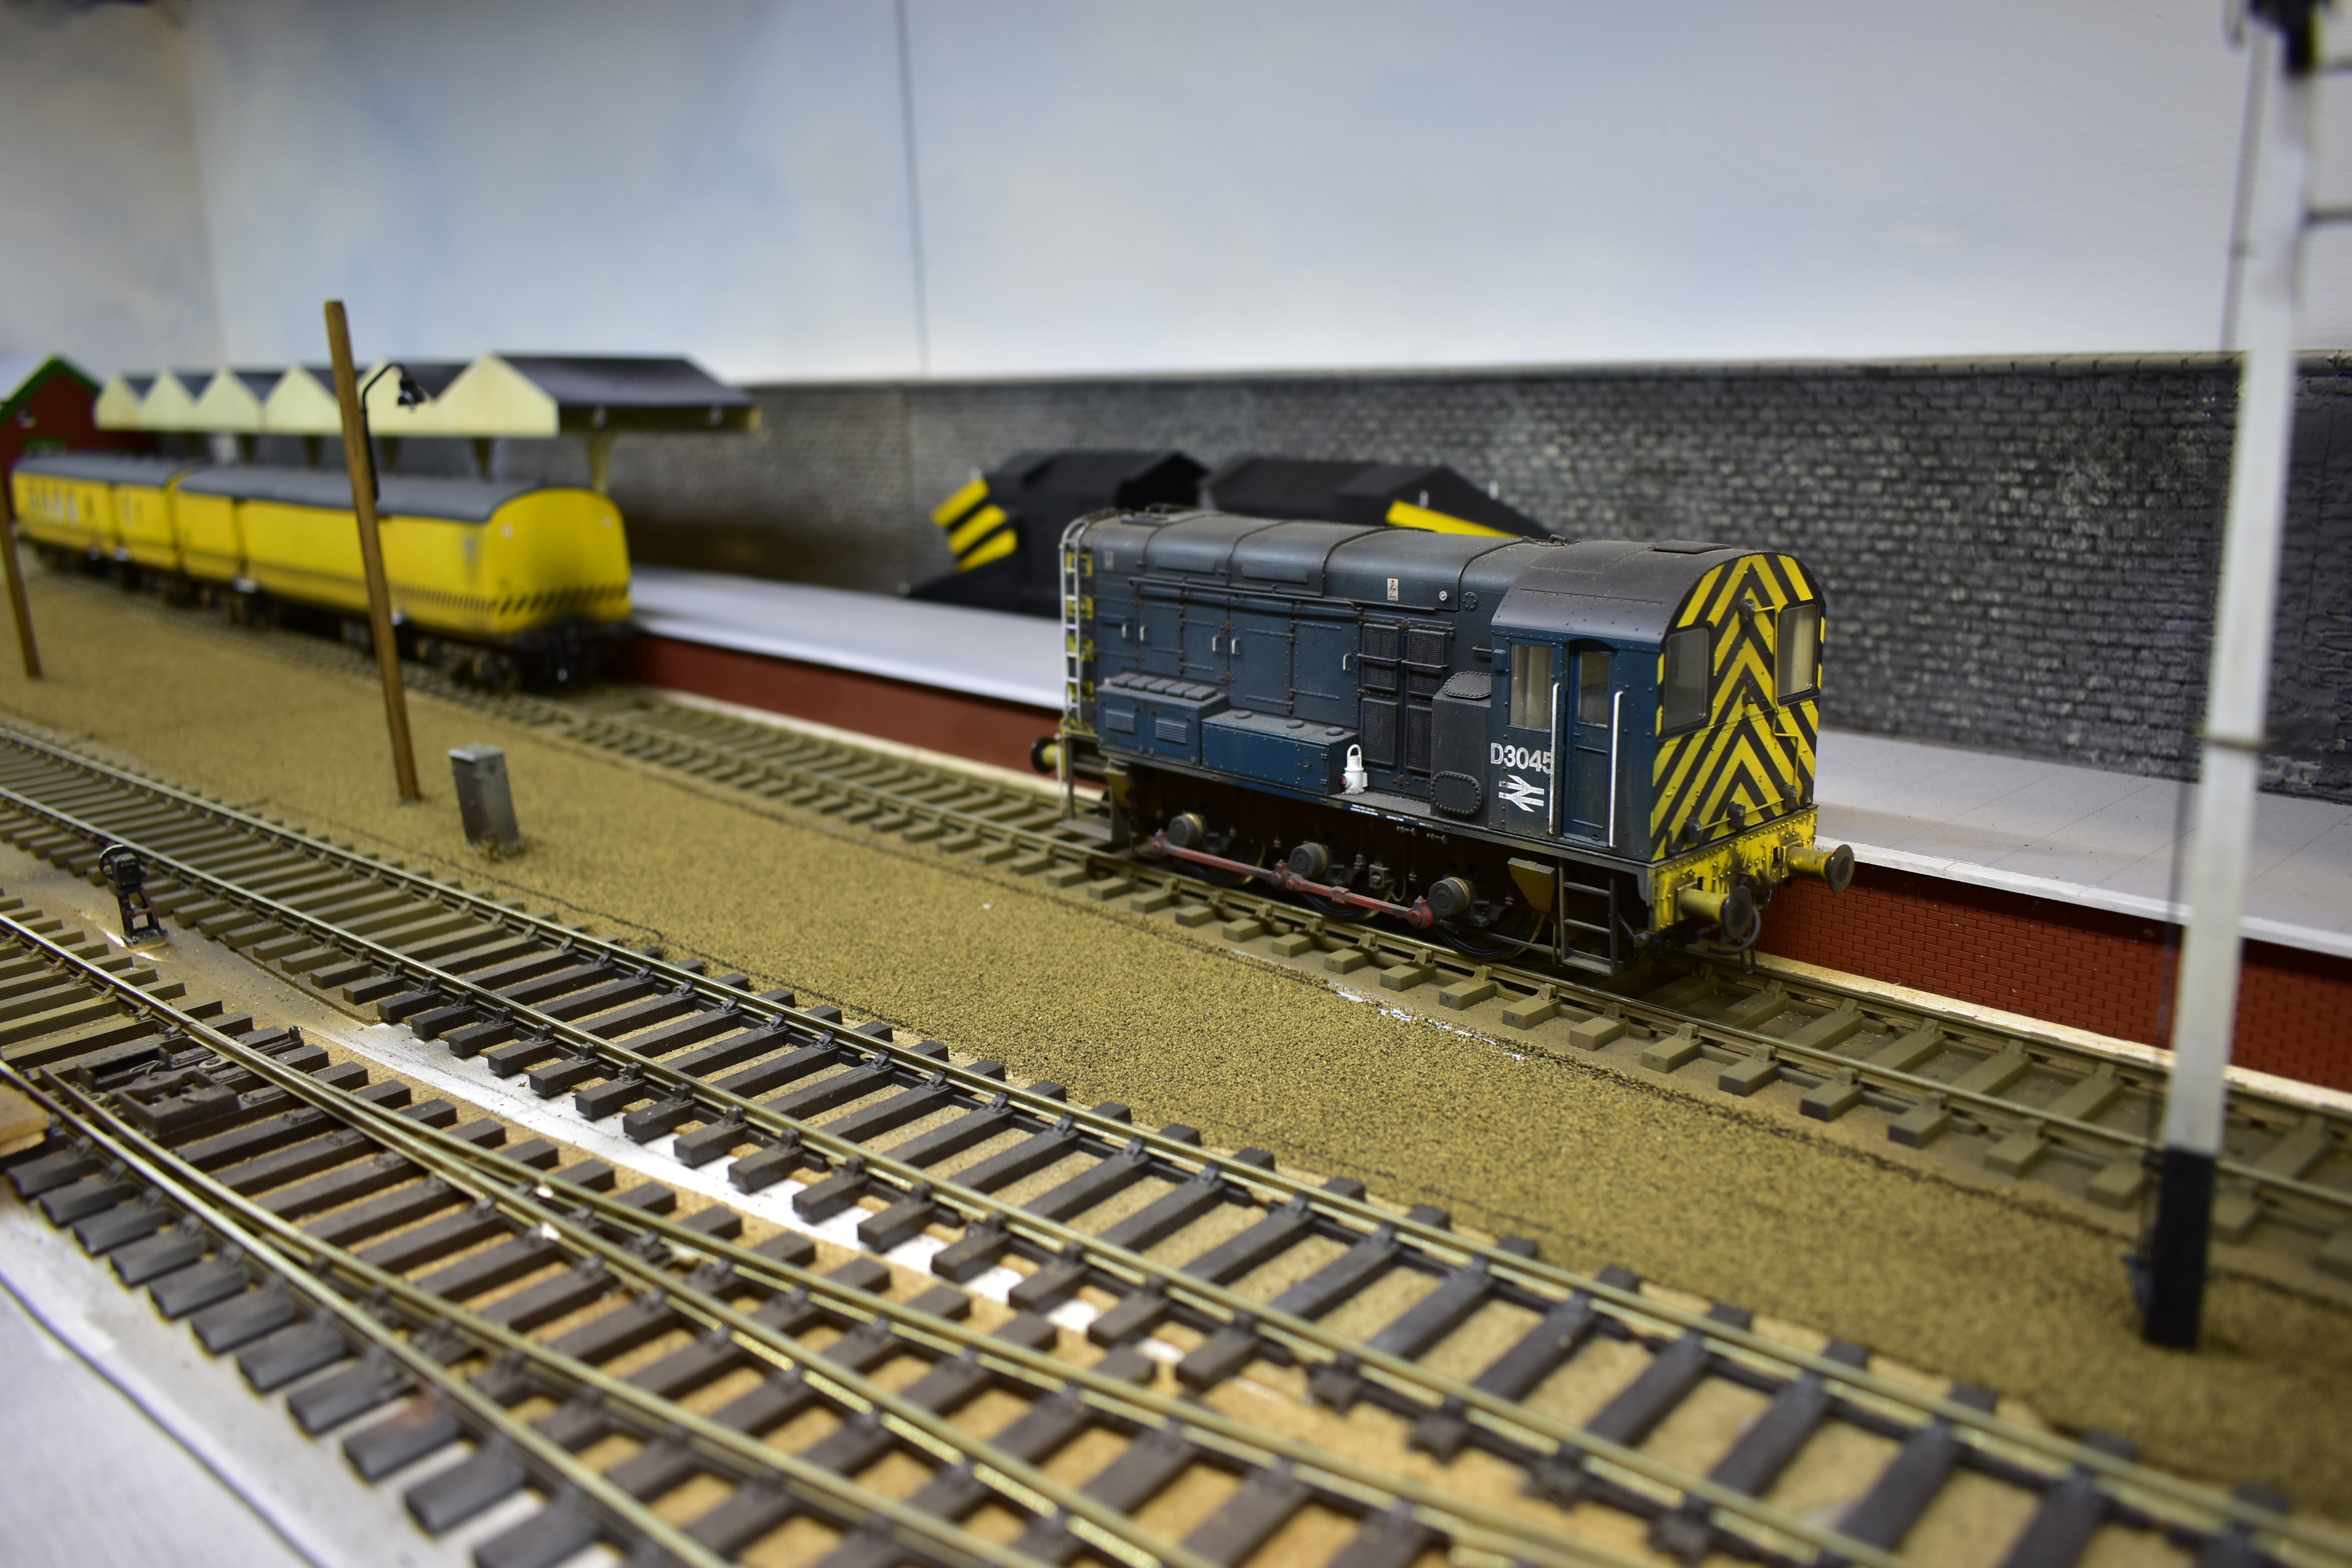
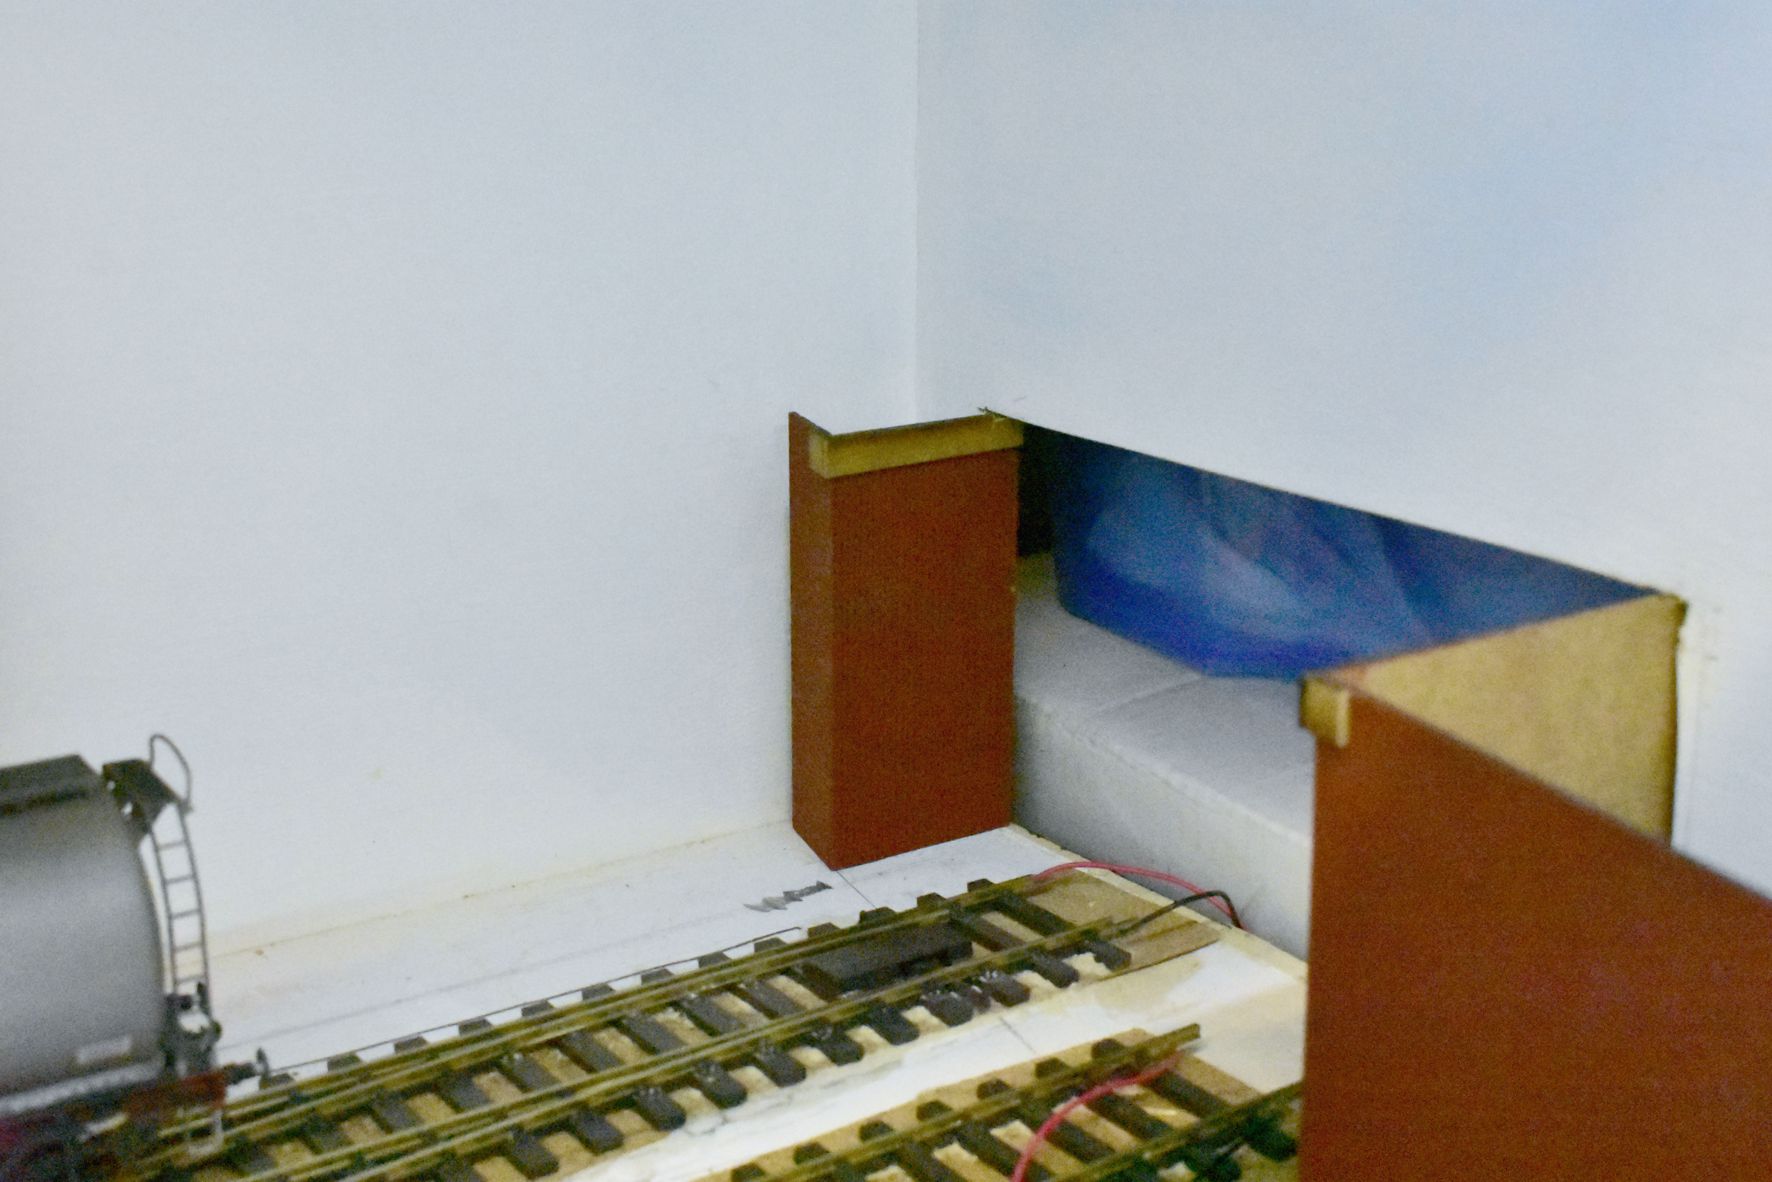
Last time we left our long sidings looking pale and not really oily and at the end of their days. So below is how we left them…

The above picture shows that we now have a little more colour, but not nearly enough yet and the track shows no signs of being weathered. I shall do this when all the ballasting is done.

I will use lots of browns, black, oil spots, puddles and static grass, however, in my eagerness I started to focus on an an area down the other end, the coal yard.

I chose to stick some cork down to raise the height and save a bit of ballast and/or clay, however, in hindsight, I should have put foam board around the lot and skipped the ballast stage.

Despite the warmth in recent days the glue took ages to dry and I hate waiting for things to dry. Once the ballast was dry, I started to put chunks of DAS clay into the ballast, pushing it in with my fingers.

This is the scene after the forground is covered in DAS clay and a start made at the back. When, I’m done, I stipple the clay with a stiff one inch brush which gives the clay a nice rough surface and hides all the joins from all the pieces.

The whole are is now covered and I’ve run a vehicle over the clay so some tyre marks will be present in the muddy ground. I also pushed my finger in hard in one spot so I can create a nice large puddle. The area will have piles of coal, coal sacks and a coal merchant’s hut. I’m really looking forward to this little bit of gritty history.

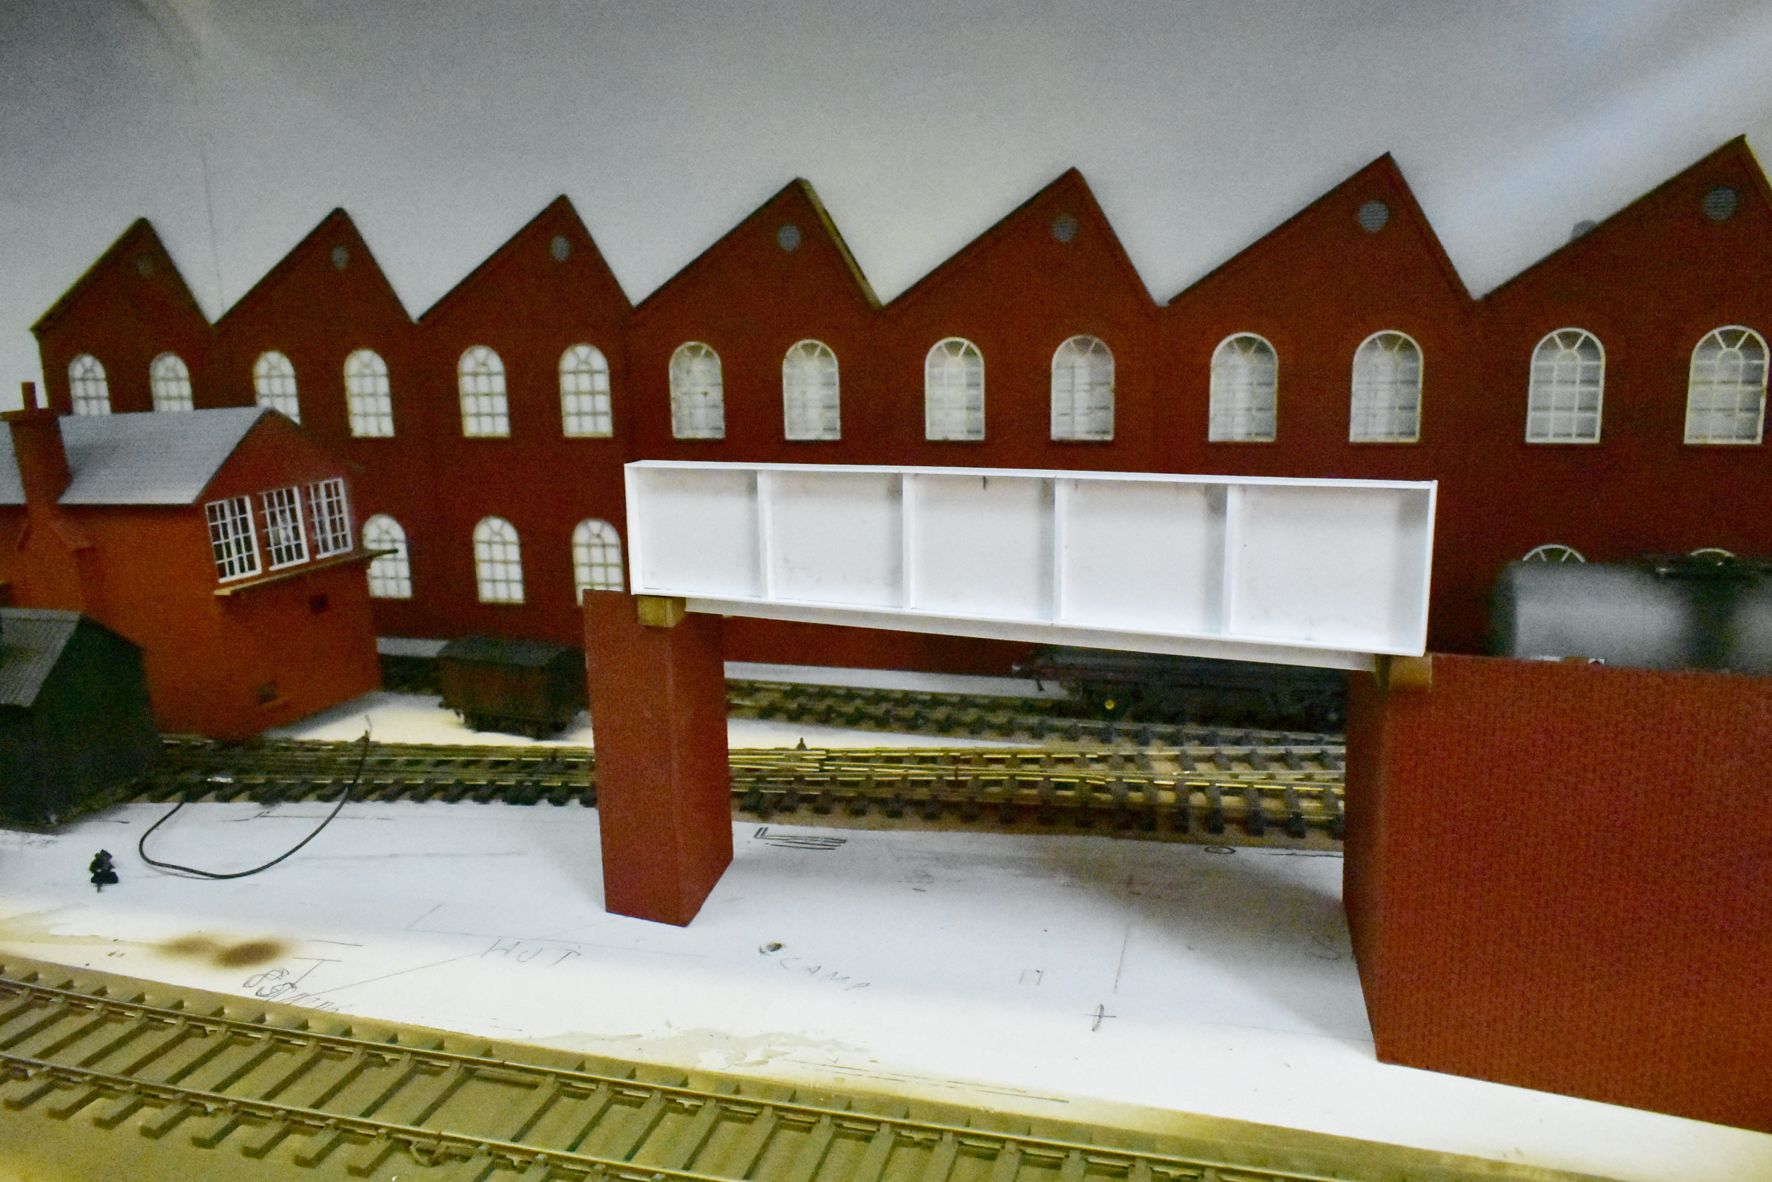
I was tempted to make one of these crossings with coffee sticks but when someone has made such a lovely job of these, why would you bother. Cutting the angle sections was fun though.

I’ll keep on ballasting, then I hope we’ll have something that starts to look like a proper railway!

Come back soon!

Shaun

Another Brick in the Wall!

It’s a great song from a great album but I wonder if there was a stage during the writing and recording where they thought, OMG what are we doing. I’m feeling like this a bit at the moment with the layout, and I think it’s to do with the colour of the DAS clay not the clay itself. The track and rail chairs need to be painted and I think that will help a lot, and then I think using the airbrush will make a big difference.

ER! WELL, I THINK IT WILL IMPROVE!

I’m keen to get a lot of the structural things sorted which will help give a sense of where everything is and I was eager to add a perimiter wall. I had some strips of laser cut wood which were left over from the non scenic sides of the platform. I used these to create a wall around the sidings and think that this worked really well. It’s exciting when things start to come together.

WHAT A MESS!

The small area at the front will provide a valuable opportunity to add some greenery to the layout and I have also been able to avoid and absolutely straight fence by following the line of the track. I hope I can even get some trees at the front (near the steel ruler) which will push the railway back in to the scenic display.

The picture above shows the spoace that is going to be my coal yard. I’m really looking forward to the building of this section as I loved the previous coal yard that I built on my previous layout.

HERE’S ONE I MADE EARLIER WITHOUT DOUBLE SIDED STICKY TAPE!

I’m excited about doing more work on the layout whilst trying to think about the layout and how people will look at it. Will they enjoy it, will they think the modelling is good and will it capture their attention. I know what I want to achieve, I just hope it will be received well by those people who see it.

Finally, a little posed shot of a couple of rail workers. I’m not into gimicks or funny cameos. However, I do want people to look at the work of the people who have built the layout, the quality of the rolling stock, buildings and scenery and I want to talk to people too just like the railway workers depicted here!

Encourage the Young ones!

George operating his Layout

This is my son George. He is 9 years old and quite likes trains, certainly not as much as me but he likes to be invovled. So I try to encourage him and this is the result. It’s a simple oval of N gauge track with some sidings and a hidden siding under the hill. It’s his layout, Freemakers Lane.

This picture was taken during the N Gauge Day held by Great Eastern Models. They know George well and cope wonderfully with his quirky manerisms. As much of what you can see came from GE Models, they knew that this layout was being built and graciously allowed us both to come to display the layout, if nothing else, as an encouragement to children and people who’ve never modelled before.

As you can tell from this blog, not a lot of work has taken place on George’s layout so I thought we needed to put this right. Out came the layout and I tried to think what we could do.

The three little cottages on the hill were purchased on the day of the N gauge show and may have actually been stuck there while we were in the shop, but that’s the last time anything got done to it till yesterday and today.

I decided we should concentrate on the area around the cottages so laid down a stone country road and some bushes. When I said I did this, I really mean George did it so you have to put aside any comments about quality and realise that an autistic 9 year old is wanting to do something himself, and autistic 9 year olds want to get cracking without listening to instructions. So here are some pictures from last night and today!…enjoy.

Well that went quite well and George was certainly every excited about working on his layout again. His was very anxious about getting this work on the blog so if you never care about sending me a message, I’d love you to send him a comment about his layout!

By the time George had got home from school, I had got some more grass out from my garage and was ready for him to do the next stage – the grass bushes around the cottages and the road. This is a picture of it all everywhere before the lose material was sucked out of the way!

Well, that’s as far as we got. I added a little more grass around the factory area and had a play with the BR Blue class 25 (well what did you expect from me) and a few wagons. We now need some more buildings and tree. But that will be for another day I guess. I will need to get my OO gauge layout into the house soon to get it ready for some exhibitions in August.

I guess the main point of this blog today is that we have to encourage the young ones if there is ever going to be a hobby in years to come. If there isn’t a younger generation interested in trains then there will be no clubs and no shows. This year this is no Southwold show. So this is not a made up opinion. This first class show couldn’t go one because those involved were getting too old to manage all thats required for such a show.

Let’s try to get a younger generation invovled so that our hobby lasts for many years to come.

Cinders and Ashes!

I said I might not get to the ballasting for a few weeks however, things moved on in certain areas and I got carried away with myself. I had purchased two grades of ballast, the finest, which one cold easily say was more suited to N gauge layouts and then medium ballast which could arguably be ore suited to OO gauge layouts.

My layout will be set in the early 1970s, in the pre-TOPs days. These days were not that long after the days of steam and it was common for goods yards to have a poorer quality of ballast. Very oftern the track was supported by anything available such as cinders or ashes and eventually this reached the tops of the sleepers and often covered them totally. Look at the picture of the goods area in Norwich station and the tracks at the bottom of the picture.

There is a good way to achieve this effect and it has been developed, mastered and documented by the modelling and photographic expert Chris Nevard. If you look on his blog by following the link given here – http://nevardmedia.blogspot.com/2011/08/creating-effect-of-ash-ballast.html you will be able to see how this look is achieved.

I have been following some of his advice to create a similar effect for my goods sidings and will also use the same methods when I attend to the siding near to the signal box. I started off by laying a really level layer of brown ballast which will be the main ground surface like you can see around the signals.

I needed to give this two layers of what was Woodland Scenics Fine Brown Ballast and was really please with how flat it dried out. I also made sure that other details such as relay cabinets were put in place now rather then chopping out scenery further down the line.

THE BALLAST USED IN THE SIDINGS

I stuck a border of masking tape down so the ballst stayed in the area where I wanted it and the added advantage was a nice neat edge to the ballast. There were no suprises to the ballasting process, however I was quite anal about putting the ballast in place as prior to the application of the glue there was not one grain of fine ballast on any sleepers. Being fussy at this stage saves a lot of time later on so I’m happy to be a bit obsessive once in a while..

THE BUFFER STOPS WITH THE FINE BALLAST FIXED IN PLACE. STAGE ONE…COMPLETE!

I gave the ballast a few days to dry but the warm weather helped the glue to dry so I was able to move onto the next stage. I used DAS modelling clay to create the surface shown in the picture of Norwich station. You could follow the advice given by Chris Nevard and that would be a good idea, however, I chose to get a little bowl and broke of small manageble pieces of DAS clay into the bowl ready for when it was needed. I also added some water into the bowl so the clay didn’t dry out as it was quite warm in my garage.

There is still more to do on this part of the layout but it’s certainly exciting and should look good when completed.

Ready to Work!

After finishing the painting of the facotry units I was able to get out the airbursh to give them a slight dusting.

I could have made them sooty and work stained like the dark stanic mills of Lancashire or something from the dirty days of the industrial revolution, however, I held back on this and just gave the factorys a medium coat of grime. For the moment, I’m happy with this and have no plans to add more grime.

There are three very low relief sections near the track work and you can see on this picuture (above) I chose to place the unit sections at the baseboard join which was a convenient place. I will run a guttering pipe down infront of this join however it may need to be one of those items that is added when the layout is set up at exhibition as it would be too fragile on the end of the board.

As I type this, the glue is now setting on the other factory sections which move forward about 15mm. They are being held in place by Heljan engine boxes which are clearly made for such jobs!

MADNESS IN ACTION!

The other thing I’ve been working on, is my signal box. I have to say that for a long time, it did look like a pile of laser cut parts but now it is starting to look like it could be a real signal box. It still has no glazing but the roof is almost done having been covered by tiles that were all cut and stuck in place one by one! I now have the ridge tiles to do and will stick the roof on once it has an interior.

It’s not snowing in this scene, nor are there large bird droppings, the white spots are little bits of PVA glue and will dry clear by tomorrow morning. I have a little more weathering to do on this building too.

WHAT ONE EARTH!

Finally, I know I said that ballasting might not take place till after the summer but I can explain myself, another day….

It’s a Dirty Job!

But someone has to do it!

Well that someone is me since it’s my layout. The factory units were chosen to be a good focal point on the layout but they also provide an interesting railway/industrial background.

FACTORY UNITS IN BAUXITE CAR PRIMER

These were the laser cut facory sections after they had received a coat of bauxite car primer. This really makes a great brick colour and coming in a larger tin, its good value too!

The windows are nicely cut from white card by laser but they are slightly discoloured by the laser so I painted all my windows again.

WINDOWS FITTED – NOTE THE DISCOLOURATION DUE TO THE LASER

I think had had said in a previous blog page that I wanted some sections to be flush to the rear of the back scene and then some other sections just slightly further forward by about 15mm. To do this, I had to cut all the roof sections. Once these were all cut, I glued them into place. They were then painted with matt black paint once the glue was dry.

The laser cut panels feature stone window sills and arches at the tops of the windows. I wanted these to stand out so I started to paint these. Given the fact that I was having to cover a dar colour, the first coat of paint acted as an undercoat,

FIRST COAT OF PAINT AROUND THE WINDOWS.

Having painted the first colour, I decided that I needed to purchase a slightly different colour, something that was a bt more of a ‘concrete/stone’ colour. Once the first coat (shown above) was dry, I added the second coat and painted the window sills again too.

Once the window arches had their second coat, I was really pleased. The lighter colour did stand out but I knew that some weathering would help to tone it down a bit.

I used Railmatch paints through my airbrush to weather the factory units. To begin with I used some Sleeper Grime as the base of the units would get dirty from the nearby track and trains. I also put a faint dusting of this colour over the window arches to show the grime that would run down the walls and over the window surrounds. I then mixed some matt black for some further weathering. I didn’t want to create a black factory so tried my best to give the units a light weathering effect around the roof sections, the windows and certain areas of brickwork. I gave a little more attention to where the panels join and these will have some guttering and pipe work added around there so I wanted this area to look a little bit more grubby.

There’s still a lot more work to do on the buildings. The signal box roof is coming on, but the roof tile paper is at work. It will also need weathering and the station building hasn’t had any more attention at all. What will I do about the insides of these buildings, I will almost certainly need to get a kit for the inside of the signal box…but that’s something for another day. Now where are those glazing strips…

The ‘BIG THINGS’ take time..

Despite the urge to start on some scenic items such as ballast, I’m keen to get some of the bigger things ready first so I don’t have to scrape up ballast at a later stage. As I’ve said on previous ocassions, all of my buildings were made by the same company and this has provided a certain snese of consistency.

I’ve started to paint the station building, the canopies, the signal box and the factory units that will go behind the tracks on board No. 3. Using a cream and green paints, I painted the station building and signal box after picking out the window frames in white.

The station building really started to look good once some paint was added.

BEFORE PAINTING
DURING PAINTING

The signal box required quite a lot of painting in both cream and green. Due to absorbant nature of the wood, I had to paint some areas twice.

The building hasn’t been glazed yet, in fact none of the buildings have any windows yet. The glazing will be added once the buildings have been weathered.

While I will be able to stick the factory units in place quite soon, the signal box and station building will need to wait for other details to be added around those areas.

You can see that the roof sections have lines cut into them. I like to cut individual tiles from grey card and stick them on one by one. This sounds like madness but I really like the end result and it allows me to model things like a slipping slate.

The factory units are really lovely and go together well or work as a single unit. This one will be fixed at the edge of board No. 2 with the rest of the factory units on board No. 3 As you can see they need one more coat of paint around the windows before they are weathered. I want to add some gutters and down pipes however these won’t be added until the factory units are fixed into place. Finally, there’s one other detail I’ve added recently add that is a few yard lamps near the two main sidings. Theses are working lamps but I’m not sure if they’ll get used. I’m not fond of layouts which have lots of lights on during the day time when they wouldn’t be used.

There are lots of other ground level details to add at the moment and I will need crack on with these soon so that i can consider the weathering at some point. Despite all the best intentions, I can’t see any ballast arriving until the summer is over.

Trying to earn my Stripes!

We’ve been blessed with good weather for the last few days so like a man on a mission, I have unboxed a whole range of items which required a little attention in the weathering department. These were OO gauge and O gauge and spread over a number of era reflecting some of my modelling interests and activites at home and with my modelling chums, Kelvin, Graham and John.

A couple of items are needed quite soon for exhibition dates and some are just for my own pleasure.

The snownplough are an MM1 kit which was formerly available from JLTRT. They are really lovely models and go together well. I had purchased some transfer stripes from Fox Transfers but the whole stripe panel is too small so I masked the stripes myself after searching hard for a tape which was 7mm wide. Why this was so hard I don’t know come on Tamiya. 7mm tape too please!

I do have some small transfers to add but I will give the paint a few days to harden before I contemplate any more work on these.

This picture is quite significant because it shows the first O gauge engine that I have numbered and weathered. Up to this point, I have passed the scary bits of work like engines to Kelvin to do as he’s the expert and I’m just a learner but I thought I’d give it a go.

You can clearly see mine is the front one and is quite clean in comparison. I may need to give the body a bit more dirt yet but I’m pleased with it so far. I need to pick out the bogie springs yet and this will add some more colour to the drab bogies. I look forward to running these engines nose to nose on my layout which is amongst the clutter in the background of these pics.

Finally, something a little different but I couldn’t resist it when it came up for sale on fleebay a while back. I’ve just weathered the underframe withthe normally approach of frame dirt, some rusty bits and the oily axle boxes and buffers all done by airbrush and then the bogie springs picked out in a redy brown colour. It may just get shunted around or run in a mail rake on my layout.

Just (don’t) add water!

The other day, I was airbrushing a whole range of different items, laying down frame dirt onto coaches, wagons and engines when I started to get some spluttering. On closer examination, I realised that it was the dreaded moisture problem.

I still have some other projects to finish and I really don’t want their finish to be spoilt by a spluttering airbursh.

So, I’ve just made quite a good little purchase from a site selling airbrushes and all the other gubbins you might need. I’ve ordered myself a little airbrush moisture trap. I can only airbrush in my garage and the equipment is stored in the garage too so I guess the airbrush, compressor and its hose go through quite a lot of temperature changes over the course of a year.

Sparmax Silver Bullet MAC moisture trap filter with micro air control valve

We’ve recently had a little break from our show schedule but these start again in August so I need to ensure that some new items are ready to introduce. The O gauge snowploughs need their final black, transfers and varnish. My recently acquired O gauge coal hoppers need to be weathered and an assortment of OO gauge stock suitable for different eras needs to be weathered. And that’s just a small amount of the projects I have in my stock cupboards. The moisture trap will ensure that there projects aren’t spoilt by faulty equipment. All I’ll need to worry about then is the faulty operator!

Love can ‘Build a Bridge’

Well love may be able to build bridges but if you want a bridge in O gauge you have to build it yourself and this is what I’ve been doing recently as I focus on board No.3.

In my last blog, I showed the hole that had been cut out for trains to pass from the traverser to the scenic area. I decided from the outset to set this bridge at an engle to avoid some of the ridigity often seen in model railway layouts. Quite often roads to not cross railways at right angles and yet in many layouts, everything appears to have been positioned on a grid resulting in lots of parallel lines and strucutres. While my space is limited on this layout, I have tried to do this where I can. I accept that the station tracks are still parallel to the edge of the baseboard but if I had boards 5ft deep I might have been able to address this.

I drew the outline of my bridge structure on the baseboard and then used panels of laser cut brickwork to form the main base board the bridge. These are made by lasercutrailwaymodels.co.uk and very good value. I collect a lot of the spare pieces from my kits and some of these pieces of laser cut wood became very useful when adding the strips of wood to the top of the bridge, representing the concrete base section that the steel bridge would eventually sit on.

Since things were going so well and I am a bit impatient, I gave the bridge base sections a quick dusting of bauxite primer. I do often get very impulsive when modelling which is one of my bad habits!

Having established where the bridges base would be, I turned my attention to the steel panel that would face out and span the two tracks. I chose to build this with plasticard and had purchased a sheet of thick material some weeks ago for this job. With the bridge base in place, I could now work out the size of the pieces I needed.

The strange 4 sided shape was the shape between the bridge supports and shows the extent of the angle I had settled on. I then measure across from one support to the other ensuring that I had measured from the widest points on the concrete base sections. This would be the width of my bridge sections.

I decided to cut this at a scale 6ft high thinking this should look right and keep any pedestrians crossing my bridge on the correct side! I cut two sections for the bridge and stuck these together, holding them with clamps while the glue dried.

As you can see in the above picture, I didn’t leave the bridge as a flat rectangle blog. I fixed a 10mm strip of plasticard all the way around the bridge section. I then had some ‘I’ section of pasticard which was used for the strenghening beams running from top to bottom. There are lots of variations on bridge designs but I do like this design and it will eventually feature some rust and weathering detail on the steel bridge section. I might think how I can add some rivet detail too!

I nearly forgot to mention the ‘I’ girders under the bridge. I have put these on to represent the framework of the bridge under the road.

Well, here are all the current bridge sections together. They will go together in their correct position but a little adjustment is needed yet before they are finally fixed in place. I think the painting and weathering will really bring them to life. Let me know what you think.